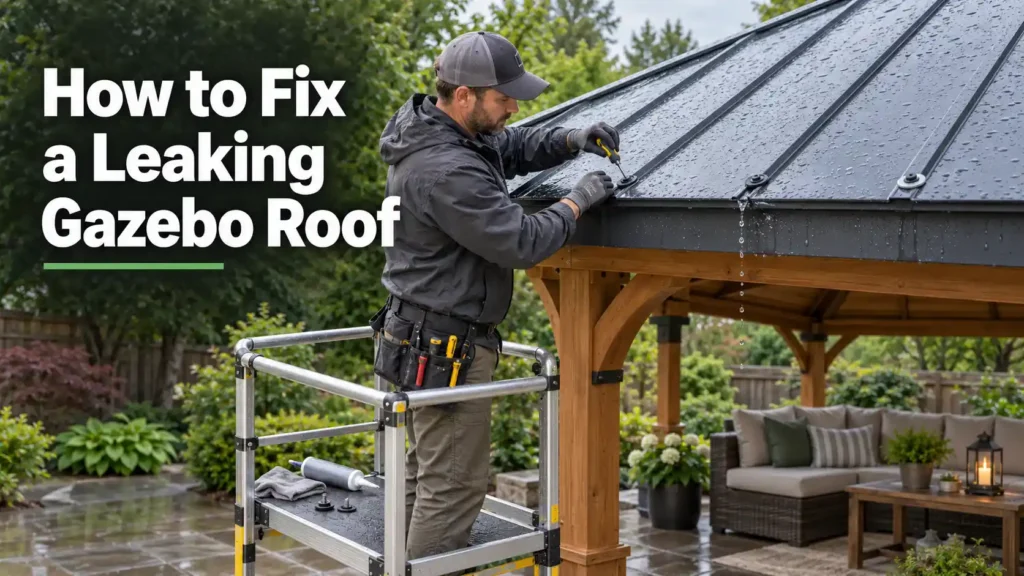
A leaking gazebo roof needs quick attention. Water can stain the frame, damage furniture, and cause wood to rot. Yet a rushed repair can trap moisture or move the leak to another spot.
Start by finding where the water enters. Do not seal every joint or cover the roof with a random coating. The right fix depends on the roof material and the failed part.
Small problems may be simple to repair. A loose fastener, blocked drain, or tiny canopy tear can often be handled with the correct part. Cracked panels, damaged flashing, widespread rust, and structural movement need professional help.
Quick answer
Move furniture away and turn off power near the wet area. Mark the drip point, but do not assume the hole is directly above it. Inspect the roof from the ground after the rain stops.
Look for loose fasteners, lifted overlaps, cracked panels, open ridge caps, torn fabric, missing shingles, and blocked gutters. Repair only the confirmed fault with a product approved by the gazebo or roof maker. Replace damaged parts when sealant would only hide the problem.
Never climb onto a wet gazebo roof. Never stand on fabric or polycarbonate panels. Hire a roofer when safe access, structural damage, electricity, or a broad leak is involved.
First, protect the area below
Deal with the active drip before you inspect the roof.
- Move cushions, grills, heaters, and other items away.
- Put a bucket under the drip.
- Dry standing water to lower the risk of a fall.
- Switch off the circuit that powers nearby lights, fans, and outlets.
- Keep people and pets away from the wet area.
Do not touch a wet fixture or cord. Call an electrician if water has entered a light, fan, outlet, junction box, or powered post.
Avoid throwing a loose tarp over the roof during wind or rain. A tarp can catch wind, damage the finish, or pull on a weak frame. Move valuable items under solid shelter instead. A trained contractor can install a temporary cover when one is needed.
Is it a roof leak or condensation?
Water below a gazebo does not always mean rain passed through a hole. Cool metal or clear panels can collect moisture from humid air. The drops may then form across a broad part of the underside.
Use the pattern to tell the difference.
| What you see | More likely cause |
|---|---|
| One drip that grows during rain. | Failed fastener, joint, panel, shingle, or flashing. |
| Water starts near the roof edge. | Gutter overflow, poor drainage, or wind-driven rain. |
| Drops appear across much of the underside on a humid morning. | Condensation. |
| A stain returns after every storm. | Entry through the roof or flashing. |
| Water follows a rafter before it falls. | Entry point may be higher up the roof. |
| Drips appear after a heater or grill runs. | Warm, moist air may be condensing on the roof. |
Condensation often looks like many small drops rather than one wet trail. Improve airflow and reduce moisture sources. Never run an unvented fuel heater in an enclosed gazebo. Follow the heater maker’s clearance and ventilation rules.
A leak usually follows rain, melting snow, or washing. Water may travel down a panel, beam, screw, or rafter before it drops. Trace the wet path toward the highest damp point you can see.
Find the leak before you repair it
1. Mark the indoor drip
Place painter’s tape on a dry post or beam near the drip. Take a photo. Note the wind direction and how hard it was raining.
Such details matter. A leak that appears only in wind may come from an overlap or ridge cap. A drip during light rain may point to a fastener or crack.
2. Wait for safe weather
Inspect only after the rain stops and the ground dries. Use binoculars or your phone camera from the ground. Look from each side of the gazebo.
Check for:
- Missing, backed-out, or tilted screws.
- Split or flattened fastener washers.
- Rust around a hole or panel edge.
- Gaps at panel overlaps.
- A loose ridge cap or corner cap.
- Failed sealant at a joint.
- Cracked clear plastic.
- Fabric tears, worn seams, or poor tension.
- Curled, cracked, or missing shingles.
- Bent flashing.
- Leaves blocking gutters or drain outlets.
- Sagging roof parts or shifted posts.
GAF notes that roof leaks can come from damaged shingles, failed underlayment, or worn flashing. The same lesson applies to a gazebo: the visible drip is a clue, not a full diagnosis.
3. Inspect the underside
Follow stains upward. Check both sides of each beam. A clean paper towel can help you find damp wood or a wet seam.
Look for dark wood, swollen panel edges, rust trails, and wet fastener tips. Mark the highest damp point. Compare its position with the roof surface outside.
4. Clear the drainage path
Remove leaves from gutters and outlets with a ground-level tool. A blocked gutter may send water under the roof edge even when the roof has no hole.
Check the slope as well. Water should move toward an edge or drain. A low spot can form when a panel, frame member, or fabric cover sags.
5. Use a controlled water test only if needed
Run a water test after the roof has dried. Have one person watch below while another uses a garden hose from the ground. Keep electrical power off.
Start at the lowest suspected area. Wet one small section with a gentle spray for several minutes. Wait before moving higher. Stop as soon as water appears below.
Do not use a pressure washer. Do not aim water upward under overlaps or ridge caps. A strong or poorly aimed spray can create a leak that normal rain would not cause.
Match the repair to the failed part
| Leak source | Correct repair direction | Poor shortcut |
|---|---|---|
| Loose roof fastener. | Check its alignment. Replace it with the stated fastener and washer if damaged. | Driving it down until the panel bends. |
| Failed washer. | Replace the fastener or washer with the maker-approved size and material. | Covering the screw head with a large blob of sealant. |
| Open panel overlap. | Realign the panel. Renew the approved seal or gasket. | Sealing only the lower edge and trapping water. |
| Loose ridge or corner cap. | Refit the cap and replace missing hardware. | Filling the whole gap without checking the cap. |
| Cracked clear plastic. | Replace the panel or use a repair approved by the maker. | Using roofing tar or a solvent-based glue. |
| Small fabric puncture. | Clean and dry it. Apply a matching patch kit. | Using household tape on wet or dirty fabric. |
| Failed fabric seam. | Use the maker’s seam repair or replace the cover. | Sewing through a coated cover without sealing the holes. |
| Missing asphalt shingle. | Have the shingle and any damaged layers replaced. | Smearing roof cement over the open area. |
| Rotted wood roof part. | Replace the bad wood and correct the water source. | Sealing over soft wood. |
Tools and materials you may need
Gather supplies only after you know the roof type and model.
- Owner’s manual or assembly guide.
- Phone camera or binoculars.
- Painter’s tape and pencil.
- Garden hose with a gentle nozzle.
- Soft cloth and mild approved cleaner.
- Correct screws and sealing washers.
- Correct gasket, closure strip, ridge cap, or roof panel.
- Sealant approved for the exact roof material.
- Matching fabric patch kit.
- Work gloves and eye protection.
- Stable ladder, if the repair point can be reached safely.
One tube marked “roof sealant” is not safe for every roof. Chemicals in some products can attack plastic, soften a coating, stain fabric, or stop a future repair from bonding.
Read the gazebo manual first. Check the roof maker’s product list as well. A repair made with an unapproved part may affect the warranty.
How to fix a leaking metal gazebo roof
Metal gazebo leaks often start at fasteners, laps, ridge caps, or edges. Expansion and wind can loosen a part over time. A sealing washer can also split, flatten, or shift.
Repair a leaking fastener
Inspect the screw from a safe position. A correct fastener should sit straight and hold its washer evenly against the panel. It should not crush the panel or squeeze the washer far beyond the screw head.
Do not keep tightening a loose screw in a stripped hole. The screw may feel firm for a moment, then fail again. Replace it under the gazebo maker’s directions. The new part may need a different approved size, but do not choose one by guesswork.
Use a fastener with the specified corrosion protection and sealing washer. Tighten it only as the manual directs. Stop if the panel dimples.
Repair a leaking seam or overlap
Clean the area with a product safe for the finish. Let it dry. Check that the panels overlap in the correct order and still sit flat.
Realign loose panels before adding sealant. Replace a missing closure strip or gasket. Use only the sealant listed for that roof system.
Do not seal a path that is designed to drain. Some roof profiles have channels or openings that let water escape. Filling them can send water toward the frame.
Repair a ridge-cap leak
Look for loose screws, a shifted cap, gaps at the ends, and failed seals. Refit the cap before resealing it. A bent or cracked cap should be replaced.
Water found near the ridge may have entered at a higher cap joint and traveled along a beam. Test one section at a time before deciding the job is complete.
Treat rust as damage, not dirt
Surface rust around a scratch may be repairable with the maker’s touch-up system. Rust around a fastener hole may mean the hole or panel has weakened.
Do not grind a coated panel without clear instructions. Removing good coating can spread the repair area. Replace a panel when corrosion has made it thin, perforated, or unable to hold a fastener.
How to fix a leaking polycarbonate gazebo roof
Polycarbonate roofs rely on panels, profiles, seals, and room for heat movement. A random adhesive can damage the sheet or lock it so tightly that it cracks as temperatures change.
Check the panel before reaching for sealant
Look for a crack, loose cap, missing gasket, open overlap, or failed fastener washer. Check whether the panel has slipped out of its profile.
A crack that reaches a fastener or panel edge often needs a replacement panel. A wide crack, cloudy damaged area, or warped sheet is also a poor candidate for a surface patch.
Use a polycarbonate-compatible sealant
Palram states that silicone used with its SUNTUF polycarbonate panels must be compatible with polycarbonate. Its installation guidance also calls for EPDM-washered fasteners. Follow the instructions for your own panel brand rather than assuming all silicone products are equal.
Clean and dry the joint as directed by the sealant maker. Apply sealant only to the stated overlap or profile. Keep drainage channels open.
Avoid roofing tar, gasoline-based products, and strong solvents. They may stain, craze, or weaken the panel.
Do not walk on clear roof panels
Polycarbonate can bend or break under a concentrated load. Work from below, from the ground, or from a safe access platform that does not rest on the sheet. Hire an installer when a panel must be removed from above.
How to fix a leaking fabric gazebo roof
Start by taking the canopy down if the manual allows safe removal. Spread it on a clean, dry surface. Mark the damaged area before washing because tiny holes can be hard to find once the fabric moves.
Patch a small hole or tear
Clean both sides with the product named on the care label. Let the fabric dry fully. Round the corners of a matching patch so they are less likely to lift.
Apply the maker-approved patch to the correct side or to both sides when the kit directs you to do so. Press it flat and allow the full cure time before reinstalling the canopy.
ShelterLogic says a common vinyl or fabric patch can be used for a hole or tear in its covers, with the adhesive named in its guidance. That advice is product-specific. Use the instructions for your own canopy material and brand.
Know when a patch will not hold
Replace the canopy when:
- The tear runs through a main seam.
- The fabric feels brittle or powdery.
- Several holes appear close together.
- The waterproof coating is peeling.
- The cover no longer fits with even tension.
- Water pools because the fabric has stretched.
A tight patch cannot restore weak fabric around it. The next tear may form at the edge of the repair.
Correct poor tension
Loose fabric collects water. Check every strap, hook, pocket, and corner under the assembly guide. Tighten them evenly.
Do not pull one corner hard enough to distort the frame. Replace stretched straps or a misshaped cover. Never leave water or snow sitting on a soft top.
How to fix an asphalt-shingle gazebo roof
Treat a shingle gazebo roof as a small roofing system. Shingles, underlayment, starter strips, flashing, and ridge pieces work together. A bead of caulk on top is rarely a complete repair.
GAF lists cracked shingles and damaged flashing among common leak sources. The company advises owners to have suspected roof leaks checked by a professional roofing contractor.
Inspect from the ground for missing tabs, lifted edges, exposed nails, and damaged ridge shingles. Check the underside for wet decking. A soft or dark roof deck may need more than a new shingle.
Hire a roofer to replace missing or damaged shingles. The roofer can also inspect underlayment and flashing that you cannot see. GAF notes that small local damage may be repairable, while broad or repeated damage may call for replacement.
Do not pressure wash shingles. Do not scrub away moss or algae while looking for a leak. Both actions can remove protective granules.
How to fix a wood-shake or wood-panel roof
Find out whether water passes through the roof covering or through a failed joint above the frame. Split wood, open knots, failed flashing, and decay can all admit water.
Let the area dry. Probe only from a safe position and do not force a sharp tool into sound wood. Soft, crumbly, or deeply dark wood may be decayed.
Replace split or rotted roof parts. Do not fill soft wood with surface caulk and call the leak fixed. Moisture can remain inside and spread the damage.
Seal or stain sound exposed wood only after repairs and full drying. Backyard Discovery advises owners to repair wood damage before applying a waterproofing product and to follow the product manual for sealant needs.
Widespread decay, sagging, or damage where the roof meets a post needs a qualified carpenter or gazebo installer.
Why smearing sealant over the roof often fails
Sealant works best inside a designed joint. It is not a replacement for a missing panel, damaged washer, bad overlap, or rotted frame.
A thick surface patch may fail because:
- The area was wet or dirty.
- The product does not bond to the roof material.
- Old sealant is loose below it.
- The panel continues to move.
- Water enters higher on the roof.
- The patch blocks drainage.
- The joint needs a gasket or new fastener.
- The roof part is cracked or weak.
Remove failed sealant only with tools and cleaners approved for the surface. Sharp blades can scratch metal and cut plastic. Ask the manufacturer or an installer when removal could harm the panel.
Safe ladder rules for a gazebo repair
Many repairs are safer in professional hands. A gazebo roof is small, but the fall distance is still enough to cause a serious injury.
Stay on the ground when you can. Use a camera, binoculars, or an extension tool. Never lean a ladder on a weak gutter, fabric valance, thin panel edge, or loose frame part.
If a low repair can be reached from a ladder:
- Inspect the ladder before use.
- Set it on firm, level, dry ground.
- Keep it clear of power lines and powered parts.
- Face the ladder while climbing.
- Maintain three points of contact.
- Keep your body between the side rails.
- Never stand on the top step or cap.
- Climb down and move the ladder instead of leaning sideways.
- Ask another adult to control access to the work area.
OSHA includes stable placement, three-point contact, and no use of the top step in its stepladder guidance. Those workplace rules are also sensible at home.
Do not climb with a bucket, large panel, or loose tool in your hands. Stop if the repair requires you to step onto the roof.
Test the repair
Follow the full cure time for the sealant, adhesive, or coating. Dry to the touch does not always mean ready for rain.
Run a gentle hose test after curing. Begin below the repair and work upward in small sections. Have someone watch the old drip point. Keep the power off until the area stays dry and any wet electrical item has been checked.
Inspect again after the next natural rain. Check the roof underside, frame joints, and floor. A dry first test is helpful, but wind-driven rain may reveal a gap that a hose test missed.
Common repair mistakes
Sealing the drip point instead of the entry point
Water can travel along a beam before falling. Trace the damp path to its highest point and confirm the source.
Using indoor caulk outdoors
Indoor products may not handle sun, rain, freezing, or panel movement. Use the exact sealant type named by the roof maker.
Mixing sealants
New sealant may not bond to old material. Two products can also react with each other or with the panel. Confirm compatibility before applying anything.
Overtightening screws
Too much force can crush a washer, dimple metal, or crack plastic. A damaged hole may leak more than the loose screw did.
Patching wet fabric
Adhesive needs a clean, dry base. Moisture and dirt can make the patch lift.
Ignoring drainage
Blocked gutters and low spots keep water against seams. Fix the water path as well as the visible drip.
Walking on the roof
Foot pressure can bend metal, crack plastic, tear fabric, loosen shingles, and shift the frame. It also creates a major fall risk.
Repair or replace the roof?
A small, isolated fault often supports a repair. Broad damage points toward replacement.
| Repair may make sense when | Replacement may make sense when |
|---|---|
| One washer or fastener has failed. | Many fasteners and holes have failed. |
| One short seam has opened. | Several seams leak after past repairs. |
| One small fabric puncture is in strong material. | Fabric is brittle, stretched, or torn at seams. |
| One panel cap or gasket is loose. | Clear plastic is cracked, warped, or badly clouded. |
| One shingle is damaged and the deck is sound. | Shingles are widely worn or the deck is soft. |
| Rust is limited to a small coating chip. | Metal is thin, has holes, or is rusted at many points. |
| The frame is square and stable. | The roof sags or the posts have shifted. |
Check the age of the roof and the price of model-specific parts. A new cover or panel may cost more than a tube of sealant, but it can be the sounder repair.
When to call a professional
Arrange professional help when:
- Water has entered powered parts.
- The roof or frame sags.
- A post, beam, or connector has moved.
- The repair requires walking on the roof.
- The leak is near the ridge and cannot be reached safely.
- Several areas leak.
- Wood is soft or rotten.
- Rust has made a hole in the metal.
- A clear panel has a long crack or has left its frame.
- Shingles, the lower roof layer, or flashing need replacement.
- A fabric tear crosses a main seam.
- The gazebo is still under warranty.
- The leak returns after one correct repair.
Ask the contractor to identify the entry point and failed part in writing. Request model-compatible materials. A useful estimate should say whether the job includes panels, flashing, gaskets, fasteners, sealant, damaged wood, and cleanup.
How to prevent another leak
Inspect the gazebo in spring, fall, and after severe weather. Look from the ground for loose parts, shifted panels, torn fabric, rust, and blocked drains.
Keep leaves out of gutters and roof valleys. Clean the roof with low-pressure water and material-safe tools. Touch up damaged finishes under the maker’s instructions.
Check fabric tension often. Remove a soft top for the season when the manual requires it. Do not allow rainwater or snow to collect on a canopy.
Watch the frame as well. A roof cannot stay sealed if the gazebo is out of square, poorly anchored, or moving in wind.
Frequently asked questions
Can I use silicone to stop a gazebo roof leak?
Only when the roof maker approves the exact type and location. Polycarbonate needs a compatible silicone. Metal roofs may call for another sealant, tape, gasket, or closure. Silicone will not fix a cracked panel, bad washer, or loose cap.
Why does my metal gazebo leak at the screws?
The screw may be loose, tilted, overdriven, or sitting in a worn hole. Its sealing washer may be split or out of place. Replace damaged parts with the size and material listed in the gazebo manual.
Can I repair a gazebo roof from underneath?
You can inspect and trace water from below. Some fabric patches may also be applied from below when the patch instructions allow it. Panel overlaps, flashing, shingles, and many fasteners must be repaired at the entry point on the weather side.
Will roof coating stop every leak?
No. A coating may hide a fault without repairing it. It can also block drainage or fail to bond. Find the leak and repair the failed component first.
Can I put roofing tar on a polycarbonate roof?
Do not use roofing tar unless the panel maker has approved it. Solvents and oils can damage or stain polycarbonate. Use a compatible sealant or replace the damaged panel.
How do I fix water pooling on a fabric gazebo?
Remove the water from a safe position. Check the cover’s tension, straps, pockets, and frame shape. Replace stretched fabric or damaged supports. A patch will not correct poor slope or a sagging frame.
Why does the leak appear far from the damaged spot?
Water follows gravity and surface tension. It may run along a roof panel, screw, rafter, or beam before dropping. Start at the highest damp point and work toward the ridge.
Should I fix a leak while it is raining?
Protect the area below, turn off nearby power, and wait. Wet roofs, ladders, and ground create fall and shock risks. Inspect and repair in dry, calm weather.
Final advice
A lasting repair begins with the correct diagnosis. Mark the drip, trace the water path, and inspect the roof after conditions are safe.
Use the part and sealant named for your gazebo. Replace damage that cannot hold a sound repair. Keep your feet off the roof, and call a professional when height, structure, or electricity raises the risk.