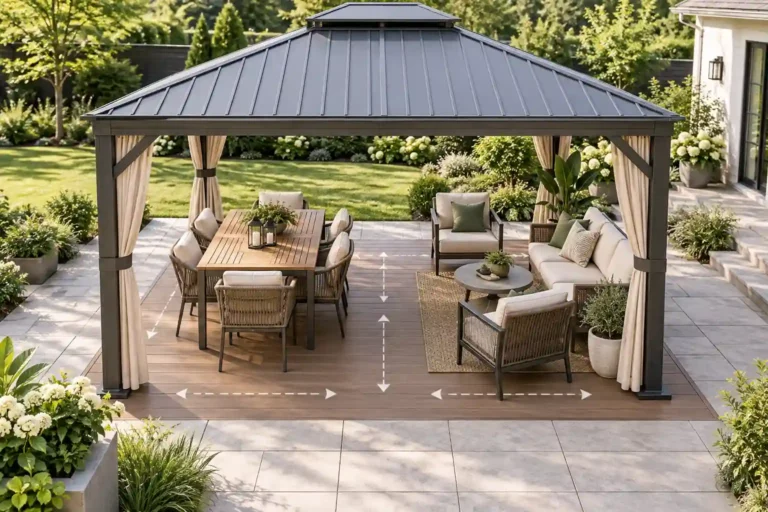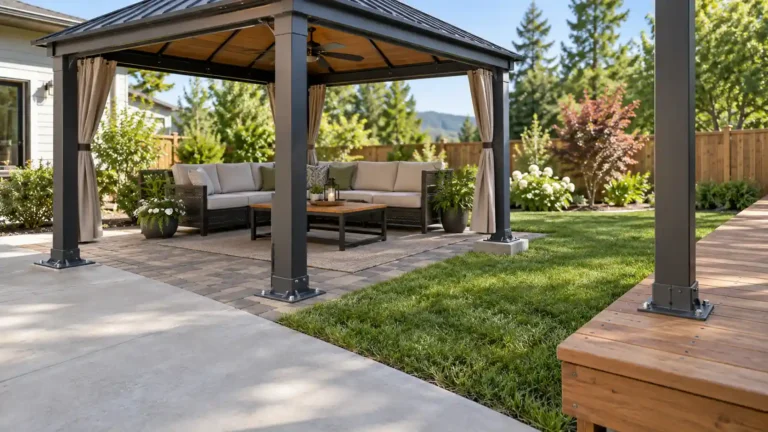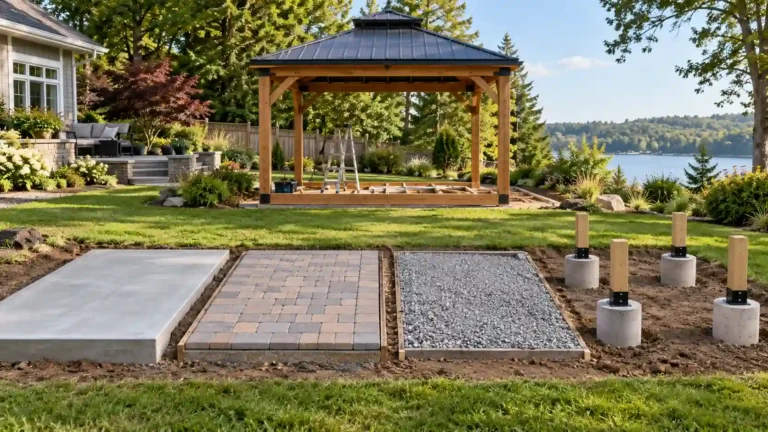
A gazebo roof can keep rain off your table while water still pools under your feet. Runoff may flow in from the lawn, spill from the roof edge, or sit in a low spot on the patio. Soon, chair legs stand in puddles and the way in feels slick.
Good gazebo flooring gives your furniture a firm base. Good drainage helps the floor dry after rain. Plan both at the same time, before you buy the surface or set the posts.
Here is how to compare floors, plan where water goes, and deal with wet spots without hiding the cause.
What Is the Best Flooring for a Gazebo?
For a dining space at ground level, start by comparing textured concrete and well-laid pavers. Both can give chairs a firm, even surface. Wood or composite decking can suit a raised space. Gravel can work for a simple garden seating area if the loose surface suits your needs.
The best choice depends on four things:
- How you will use the space.
- How water reaches and leaves the site.
- What lies under the finished floor.
- How much care you want to do.
Keep the gazebo supports in the plan. A floor can look sound while the posts need separate footings. Our gazebo foundation comparison explains how slabs, pavers, gravel, and footings work together.
Gazebo Flooring Options at a Glance
| Floor | Where it can work well | How water leaves | Main point to check |
|---|---|---|---|
| Textured concrete | Dining sets and a firm path to the seats | Across a planned slope | Low spots, cracks, and wet grip |
| Concrete pavers | Patios where you want a choice of patterns | Across the surface; through joints only in a suitable system | Base, joints, and edge support |
| Wood decking | Raised floors with a natural look | Through board gaps to the area below | Finish, rot, and airflow |
| Composite decking | Raised floors where you want less finish work | Through the gaps required by the maker | Support, heat, gaps, and drainage below |
| Gravel or crushed stone | Simple garden seating areas | Through the stone if the layers below can accept water | Chair stability, soil, and stone type |
| Outdoor porcelain or stone | A finished patio with a more formal look | Across the surface or through a designed paver system | Wet grip, frost rating, and the full base system |
Use the table to make a shortlist. Test samples with a chair, shoes, and water before you choose.
Concrete: A Firm Floor for Everyday Use
A concrete patio gives dining chairs a firm base and makes sweeping easy. Ask about a broom finish or another texture meant for outdoor use. A smooth, glossy surface may be a poor choice where rain reaches the floor.
Plan the fall and the low edge before the pour. A slab that drains into a raised border can still hold water.
QUIKRETE’s slab guidance calls for an even slope away from structures and describes a broom finish for better grip. The slab’s structural design still needs to suit the gazebo if it also supports the posts. [1]
Pavers: Flexible Layouts With Repairable Sections
Pavers suit patios that join paths or other paved areas. If a small section settles, an installer can often lift it and fix the base.
Ordinary paver joints do not make a patio a permeable drainage system. Most standard layouts still need a surface slope and a clear exit for runoff.
Keep the edges supported. A spreading edge can let joints open and units shift. Check the base design and joint fill specified for the paving system.
Wood and Composite: Plan the Space Beneath Them
Deck boards let water pass through gaps. The ground or drainage system below must then carry it away.
Follow the board maker’s rules for spacing, support, and clearance. Trex, for example, requires gaps for drainage and changes in board size. Do not fill those gaps with caulk to keep the floor dry.
Wood needs checks for splinters, decay, and worn finish. Composite also needs cleaning. Compare samples in sun if heat under bare feet matters.
Have the deck’s frame and footings checked for the gazebo loads. For the post connections, see our guide to anchoring a gazebo on concrete, pavers, grass, or a deck.
Gravel: Check Comfort as Well as Drainage
Loose pea gravel can shift under chairs and wheels. A suitable crushed-stone surface can pack more firmly, but its drainage depends on the stone mix and the soil below.
Ask for the stone specified for your floor design. A tightly packed base and an open stone layer that stores rain have different jobs.
Test a small sample area with your actual chairs. Pull them back, sit down, and walk through. If legs sink or feet slide, choose a firmer floor for that use.
Outdoor Tile and Stone: Check the Exact Product
Choose tile or stone rated for the planned outdoor use. Where frost occurs, check that the product and installation system suit freeze-thaw conditions.
Ask about grip when wet. Daltile’s outdoor floor guidance highlights slip resistance and frost performance as key checks. A product’s color or rough look alone is not enough.
Thin tile, thick porcelain pavers, and natural stone may need different bases. Have the installer specify the full system, including joints and drainage. Do not lay new tile over a slab with unresolved movement or ponding.
Can You Use Interlocking Deck Tiles or an Outdoor Rug?
Interlocking tiles can refresh an existing floor. Many need a firm, even base. IKEA, for example, lists concrete, stone, and wood as suitable surfaces for its RUNNEN tiles. That does not make loose soil a suitable base for the same product.
Check that water can still leave beneath the tiles. Allow access to lift them and clear trapped leaves.
An outdoor rug can add comfort, but lift it to check the floor after wet weather. Let both dry. Use a backing approved for the floor, and keep curled edges out of the walking route.
Plan furniture before adding rugs or tiles. Our gazebo size and furniture layout guide helps you leave room for chairs and a clear entrance.
Find Out Where the Water Comes From
Watch the site during a normal rain from a safe place. Then check it again once the rain stops.
Look for four paths:
- Roof runoff: Water drops from the eaves or overflows a gutter.
- Yard runoff: Water flows from higher ground toward the gazebo.
- Surface ponding: Water stays in a dip in the floor.
- Wet soil: Water drains through the floor but remains in the ground below.
Take photos of the first wet spot and the area where water collects. They may be in different places.
A small roof can shed a lot of water. One inch of rain over a roof with a horizontal footprint of 12 by 12 feet is about 90 U.S. gallons. That is a volume calculation, before losses. Use the actual roof footprint, including overhangs.
The figure helps explain a muddy drip line. Drain sizing also needs the local rain rate and the total area feeding it.
How Much Slope Does a Gazebo Floor Need?
Solid patios need a planned fall so water can move toward an outlet. CMHA’s guidance for interlocking concrete paving calls for a minimum slope of 1.5%. The final slope must suit the surface, site, and access needs.
For a simple example, a 2% slope drops 2 inches over 100 inches of horizontal distance.
| Distance in the direction water flows | Drop at a 2% slope |
|---|---|
| 8 feet | About 1.9 inches |
| 10 feet | 2.4 inches |
| 12 feet | About 2.9 inches |
Those figures are calculated examples, not a slope rule for every gazebo.
Measure along the actual drainage path. A 12-foot-wide patio may drain across its shorter side. A drain near the center may divide it into more than one slope.
Keep the frame aligned as the gazebo maker requires. The floor’s fall and the post bearing heights need a coordinated design. Do not tilt the gazebo or stack loose shims under its legs to match the patio.
If someone uses a walker or wheelchair, plan the route and seating area from the start. Firmness, slip resistance, level changes, and slope all matter. Access Board guidance provides criteria for accessible floor surfaces and clear spaces; one suitable slope alone does not make the whole route accessible.
Choose the Drainage Method That Matches the Problem
1. Manage Water From the Roof
Check whether the gazebo has gutters, drain channels, or outlets built into its posts. Keep those paths open and use parts approved for the model.
Direct roof water to a suitable drainage area. Avoid dumping it beside a post base, onto the entrance, or into a spot that already stays wet.
University of Minnesota Extension recommends managing roof runoff to limit erosion. A gutter needs a useful discharge point as well as a clear channel.
2. Use Surface Grading for Water Flowing Across the Yard
A shallow, shaped route in the ground may guide runoff around the gazebo. The route must continue to a place that can receive the water.
Check the whole path before changing the grade. Raising one edge may move the puddle to a doorway or a neighbor’s yard.
Do not pile soil against wood posts or cover brackets that need inspection. Seek a drainage plan if the site has broad flooding or no clear place for water to go.
3. Use a Channel Drain to Catch Surface Flow
A channel drain has a long grate that collects water along a line. It can suit a patio edge or another point where runoff crosses the floor.
NDS describes channel drains as a way to collect surface water across a wide area. Their outlet must connect to a suitable discharge route.
Plan the grate location around chair legs and the walking path. Check the drain’s capacity, load rating, and access for cleaning.
4. Consider a French Drain for Water in the Ground
A French drain uses a buried pipe with openings, surrounded by suitable stone and filter materials. It collects water from the surrounding ground and carries it away.
Its depth, route, and outlet must match the problem. A pipe under the patio may do little for water trapped in a hollow on top of the slab.
Have the soil and outlet assessed before digging. In the United States, arrange utility marking through 811. Wait for the required responses, and check whether private yard lines need a separate locate.
5. Use Permeable Paving as a Complete System
Permeable paving lets water pass through the surface into a stone base. Depending on the design, water then soaks into the soil or leaves through an underdrain.
The EPA describes permeable pavement as a system with layers that manage water. Surface joints alone do not provide that function.
Slow-draining soil may call for an underdrain or another design. Keep soil and mulch from washing into the joints, since clogging can reduce flow.
A rain garden or soakaway also needs a site assessment. Check soil, space, nearby foundations, and overflow before choosing one as the outlet.
Fix Common Gazebo Floor Drainage Problems
Use the pattern of the water to guide the first check. The same puddle can have more than one cause.
| What you notice | Possible cause | What to check first |
|---|---|---|
| One puddle in the middle of a patio | A low spot or settled section | Surface levels and the base below |
| Mud along the roof edge | Concentrated roof runoff | Gutters, drip line, and outlet location |
| Water flowing in from one side | Runoff from higher ground | Ground levels beyond the gazebo |
| Gravel that stays wet | Slow soil drainage or ongoing inflow | Soil conditions and the planned exit |
| Dampness beneath deck tiles | Trapped debris or ponding below | The original floor after lifting tiles |
| Water beside a post | A nearby low point, blocked outlet, or roof discharge | The full route from roof to ground |
Fix the cause before covering the surface. New gravel, tile, or a rug can make a problem harder to see.
Get help when the ground washes out near supports, posts move, or the wet area reaches the house.
Plan the Work in the Right Order
A clear sequence helps avoid lifting a finished floor to add drains later.
- Mark the actual post positions, floor edges, and entrance.
- Set out the furniture and the paths people will use.
- Check runoff, ground levels, and soil conditions.
- Confirm the foundations and anchor locations.
- Choose the water’s destination and any drain route.
- Set the floor heights, slopes, and post bearing details.
- Build the specified base and install the floor.
- Test the drainage and keep photos of buried work.
A controlled hose test can reveal a low spot or blocked outlet. It does not prove that the system can handle a severe storm. Check the finished area again after rain.
For quotes, ask each installer to include the same work: digging, spoil removal, base layers, drains, outlets, surface, edges, and post details. Compare the full job cost.
Keep the Floor and Drains Working
Sweep leaves before they break down in joints. Clear grates and outlets. Lift rugs after wet spells, and keep deck gaps free of debris.
Check for rocking pavers, loose boards, worn finishes, and soil washing from the edges. Use cleaners and sealers approved for the surface.
Look again after heavy rain or frost. A floor that drained well last year may have settled since then.
Add those checks to our gazebo maintenance checklist by season and material.
Frequently Asked Questions
Can a gazebo floor be completely level?
A solid patio usually needs a fall to shed water. A deck may use level framing while water passes through board gaps. Follow the design for the chosen system and keep the gazebo frame aligned as required.
Will gravel solve a muddy gazebo floor?
Only if the whole floor and drainage plan suits the site. Stone over soil that stays saturated may also stay wet. Find the source of the water and where it can go first.
Do all gazebo patios need a drain pipe?
No. Some sites can drain through a suitable surface fall to a safe receiving area. Others need a drain, soil work, or both. A pipe needs somewhere suitable to discharge.
Can I add drainage after building the gazebo?
Often, but the work may involve lifting pavers or cutting a slab. Have the route checked so digging does not weaken footings or harm buried lines. Clear blocked outlets first if they are the cause.
Conclusion
A good gazebo floor feels firm beneath chairs, gives you a clear way in, and dries after rain. Choose the surface around how you will use the space. Then make sure water has a route from the roof, across or through the floor, and away from the supports.
Before work starts, settle three points: what supports the posts, where the floor sends water, and where that water ends up. Getting those answers right makes every later choice easier, from the paving pattern to the spot where you place your favorite chair.